


How to Protect Your Bicycle During Travel
|
|
Time to read 6 min
|
|
Time to read 6 min
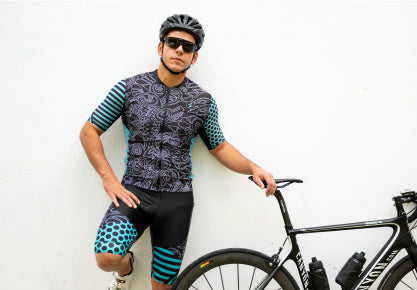
Traveling with your bicycle is one of the best ways to explore new places, race at events, or simply stay active while on the go. But your bike is more than just a a bike—it’s an investment, a trusted partner, and, for many of us, a source of pure joy. So it only makes sense to take precautions when transporting it. Whether you're headed out on a road trip, flying across the country, or just need to store your bike in an apartment or garage, protecting your ride is key to keeping it performing—and looking—its best.
Table of content
If you've ever driven behind a car with a bike rack on the highway, you've probably noticed just how exposed those bikes are. Dirt, sand, bugs, and salt spray can coat every inch of the frame. Worse yet, rain and road grime can creep into the drivetrain, leading to rust and performance issues.
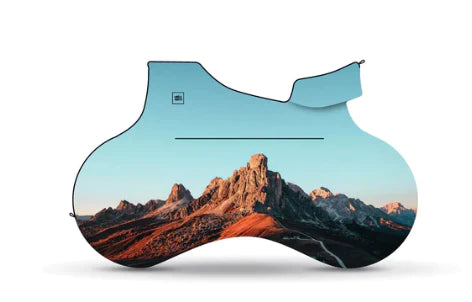
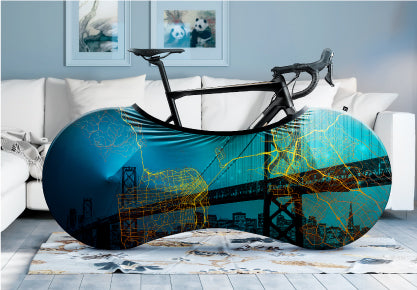
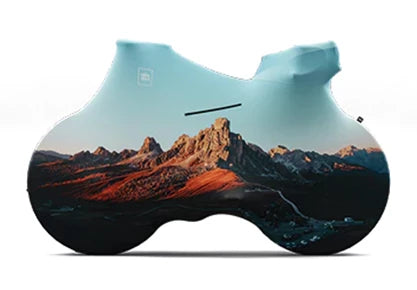
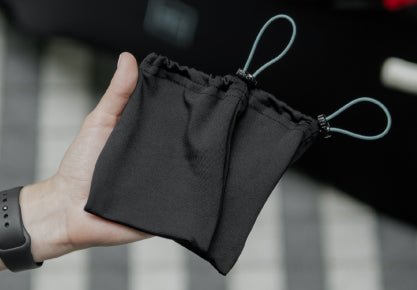
Using a full bike cover designed for travel offers an easy and effective solution. These covers create a sealed barrier between your bike and the outside world. They protect against all the elements—dust, UV rays, sand, road salt, and water. Velosock covers are made from stretchable, durable material that fits snugly over 99% of bicycles. Whether you're traveling with a road bike, triathlon or mountain bike, a full cover keeps your frame, components, and even your wheels clean.
Even when you're not on the road, these same covers double as storage protection. Whether your bike is hung up on a wall rack or parked in a tight garage corner, a full cover helps protect it from dust, moisture, and accidental scrapes. It’s a small investment that goes a long way in preserving your bike’s condition.
Traveling by car is one of the most common ways cyclists transport their bikes, whether heading to a local trail or a biking event hours away. But improper handling or mounting can quickly lead to damage.
Here are a few essentials to keep in mind:
Make sure your car rack fits both your bike and your vehicle. Look for features like adjustable clamps, wheel trays, and soft-touch materials that won't scratch your frame. Compatibility is key—if the rack doesn’t hold your bike securely, even short trips can become risky.
Once your bike is on the rack, double-check that it’s strapped in snugly—but not overly tight. Ratchet straps or soft straps are ideal to prevent frame damage. Be sure the wheels and frame are stabilized so they don’t bounce or sway in transit. It's also wise to avoid contact between the straps and components like brake levers, cables, or derailleurs.
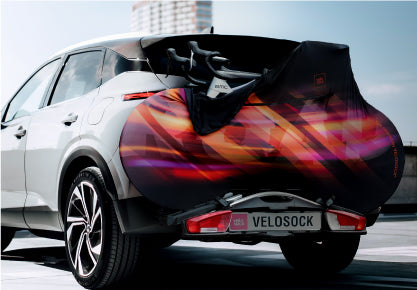
A full cover not only shields your bike from the elements but also reduces the chance of scratches caused by road debris or contact with other bikes if you're carrying more than one. Bonus: it also deters prying eyes from spotting an expensive bike on the back of your car when parked.
If you're driving a long distance, make it a habit to pull over occasionally and inspect your bike and rack. Are the straps still tight? Is the bike still sitting correctly? These quick checks can help you avoid major issues before they start.
Transport isn’t the only time your bike is vulnerable. Storage—especially in shared spaces, garages, or apartments—presents its own set of challenges. Dust, bumps, and humidity can all take a toll.
That’s where a full cover shines again. Whether you store your bike upright or hang it on a wall rack, the cover acts as a shield from dust, moisture, and accidental knocks. If you live in a small apartment or have a designated bike corner in your garage, using a cover helps keep your space clean and organized—and keeps your bike from collecting dust between rides.
Wall-mounted storage racks save space and reduce the risk of tipping or damage from clutter. Combine them with a cover, and your bike stays both protected and out of the way.
Taking your bike on a plane? Great idea—but don’t expect it to be as simple as checking a suitcase. Airlines have very specific rules and handling methods for bikes, and unfortunately, they don’t always treat them with the same care that you do.
Most airlines require bikes to be transported in either a padded bike bag or a hard-shell case. These cases help absorb shocks during handling and offer protection against careless baggage handling. If you're a frequent traveler, a hard case is a worthwhile investment. For occasional trips, padded bags offer a good mix of protection and portability.
Airline regulations often require you to remove pedals, handlebars, and front wheels. This helps reduce the overall size and minimizes the risk of components being bent or broken. Be sure to deflate the tires slightly to accommodate cabin pressure changes.
Include your name and contact information both on the outside and inside of the case. Baggage tags can be lost, and having an identifier inside helps if your case goes missing.
Check your airline’s policies ahead of time. Some require advance notice or charge special sports equipment fees. Weight limits and size restrictions also vary widely. Knowing the details in advance saves you money—and hassle—at the check-in counter.
Pack tools, an air pump, and any small spare parts you may need to reassemble your bike at your destination. A mini toolkit with Allen wrenches and a chain tool can make all the difference when reassembling after a flight.
Train travel is often more relaxed than flying, but it still requires some planning when you bring a bike. Rules vary depending on the rail operator, so it’s best to check ahead of time.
Some trains allow bikes onboard for free, while others require reservations or special tickets. In many cases, you’ll need to keep your bike in a dedicated storage area or even bring it in a bike bag.
A full bike cover can help here too—especially for keeping grease or dirt from getting on your clothes or fellow passengers. It also helps shield your bike from bumps and scrapes as it’s being stored or moved around.
Need a few more pointers? These tips may seem small, but they go a long way toward ensuring your bike arrives in the same condition it left.
It might seem counterintuitive to clean your bike before a trip, but it makes inspection and packing easier. You’re more likely to notice cracks, dents, or other issues before they worsen. Cleaning after the trip helps remove any salt, sand, or grime picked up on the road.
Lights, water bottles, and cycling computers should either be removed or secured before travel. These accessories can break off or be damaged in transit. Store them separately in a padded bag or case.
Protecting your bicycle during travel isn’t complicated—but it does take a bit of preparation. Whether you're heading out for a weekend road trip, flying across the world for a cycling event, or simply storing your bike at home, the right setup makes all the difference.
VELOSOCK full bike covers are a smart, stylish solution trusted by cyclists around the world. They protect your ride from dirt, moisture, UV rays, and road debris during car trips, plane travel, or even simple storage. Plus, their snug fit and stretchable fabric make them easy to use, whether your bike is mounted on a rack or stored indoors.
So whether you're gearing up for your next adventure or just want peace of mind at home, keep your bike clean, covered, and ready to roll.


